- Published on
Create a real-time chat application using react JS and firebase
- Authors
- Name
- Gyanendra Kumar Knojiya
- @gyanknojiya
Google firebase service provides us to create awesome web applications without having a server. So, we are going to create our chat application using firebase where we will use authentication, firestore, hosting. So, without wasting any time, let’s get started.
Create a react project:
I am assuming that you have installed node js installed on your system. If not, then download and install it first. To create a react project, run this command-
npx create-react-app firebase-chat-app
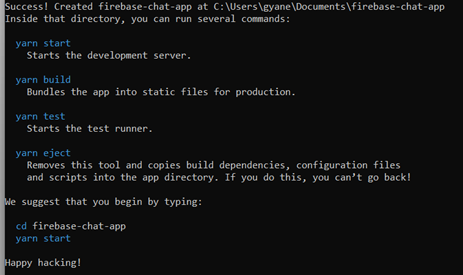
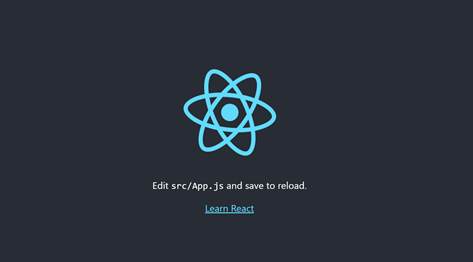 After successfully creating your project, run your development server.
cd firebase-chat-app$ yarn start or npm run dev
Open your project in a code editor and remove dummy code.
Note: How to create a firebase project and add Firebase SDK to your app
Architecture of project
Our app will have two pages. One is for authentication, where users can log in or signup using email and password, And the other for a chat, where users can send messages.
Here, we are not going to use redux for the global state, will simply use props drilling because this project is simple. If you want to use redux, you can create a global state using redux.
When a user is not authenticated, we will show them a login page otherwise will show a chat screen. So first we need to create a login and signup page.
//src\App.js

import { useEffect, useState } from 'react';
import './App.css';
import Auth from './Pages/Auth';
import Chat from './Pages/Chat';

function App() {
  const [isLoading, setIsLoading] = useState(true);
  const [isAuthenticated, setIsAuthenticated] = useState(false);

  useEffect(() => {
    setIsLoading(false);
  }, []);

  return isLoading ? (
    <div
      className="d-flex text-white vh-100 vw-100
    justify-content-center align-items-center"
    >
      Loading...
    </div>
  ) : (
    <div>{isAuthenticated ? <Chat /> : <Auth />}</div>
  );
}

export default App;
Create an authentication page:
For the authentication page, we have created auth page (src\Pages\Auth\index.js), where the user can choose to log in or sign up.
import React, { useState } from 'react';
import Login from './Login';
import Signup from './Signup';

const Auth = () => {
  const [showLoginPage, setShowLoginPage] = useState(false);

  return (
    <div>
      <div style={{ maxWidth: 400, width: '90%' }}>
        <div className="text-center">
          <h2>{showLoginPage ? 'Log in' : 'Signup'}</h2>
          {showLoginPage ? (
            <small>
              Not registered?, click
              <span onClick={() => setShowLoginPage(false)}>here</span>
              to register.
            </small>
          ) : (
            <small>
              Already registered?, click
              <span onClick={() => setShowLoginPage(true)}>here</span>
              to login.
            </small>
          )}
        </div>
        {showLoginPage ? <Login /> : <Signup />}
      </div>
    </div>
  );
};

export default Auth;
Sign up page:
The signup page will have a first name, last name, email, password. All fields will be mandatory. When a user submits the signup form, we can use
firebase.auth().createUserWithEmailAndPassword(email, password);
to create a new account. Make sure, you have enabled authentication in the firebase dashboard.
<form onSubmit={handleFormSubmit}>
  <div className="row mx-0 my-3">
    <div className="col-6">
      <label className="form-label">First Name</label>

      <input name="firstName" value={formDetails.firstName} className="form-control" onChange={handleFormChanges} />
    </div>

    <div className="col-6">
      <label className="form-label">Last Name</label>

      <input name="lastName" value={formDetails.lastName} className="form-control" onChange={handleFormChanges} />
    </div>

    <div className="col-12">
      <label className="form-label">Email</label>

      <input name="email" value={formDetails.email} className="form-control" onChange={handleFormChanges} />
    </div>

    <div className="col-12">
      <label className="form-label">Password</label>

      <input
        name="password"
        value={formDetails.password}
        className="form-control"
        type="password"
        onChange={handleFormChanges}
      />
    </div>
  </div>

  <div className=" d-flex p-2">
    <button type="submit" className="ms-auto btn btn-primary ">
      Register
    </button>
  </div>
</form>
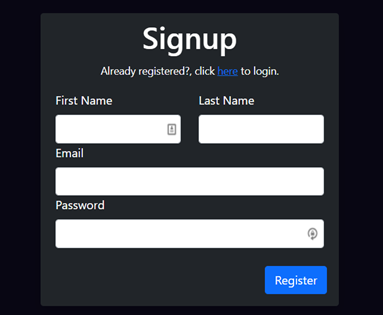 When the user sign-up is done, we will create a user in firestore.
const handleFormChanges = (e) => {
  formDetails[e.target.name] = e.target.value;
  setFormDetails({ ...formDetails });
};

const handleFormSubmit = async (e) => {
  e.preventDefault();
  const { firstName, lastName, email, password } = formDetails;
  if (!firstName || !lastName || !email || !password) {
    alert('Please fill all fields!');
    return;
  }

  try {
    const { user } = await firebase.auth().createUserWithEmailAndPassword(email, password);

    if (user) {
      user.updateProfile({
        displayName: firstName + ' ' + lastName,
      });

      await firebase.firestore().collection('users').doc(user.uid).set({
        firstName,
        lastName,
        email,
        createdAt: Date.now(),
      });
    }
  } catch (e) {
    console.log(e);
    alert(e.message);
  }
};
Login Page
Now we will create a login screen with email and password fields. We can use
firebase.auth().signInWithEmailAndPassword(email, password);
to sign a user.
<form onSubmit={handleFormSubmit}>
  <div className="row mx-0 my-3">
    <div className="col-12">
      <label className="form-label">Email</label>
      <input name="email" value={formDetails.email} className="form-control" onChange={handleFormChanges} />
    </div>
    <div className="col-12">
      <label className="form-label">Password</label>
      <input
        name="password"
        value={formDetails.password}
        className="form-control"
        type="password"
        onChange={handleFormChanges}
      />
    </div>
  </div>
  <div className=" d-flex p-2">
    <button type="submit" className="ms-auto btn btn-primary ">
      Login
    </button>
  </div>
</form>
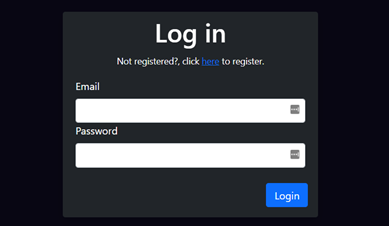
const handleFormSubmit = async (e) => {
  e.preventDefault();
  const { email, password } = formDetails;
  if (!email || !password) {
    alert('Please fill all fields!');
    return;
  }

  try {
    await firebase.auth().signInWithEmailAndPassword(email, password);
  } catch (e) {
    console.log(e);
    alert(e.message);
  }
};
In src/app.js, we will use firebase.auth().onAuthStateChanged()
useEffect(() => {
  firebase.auth().onAuthStateChanged((user) => {
    if (user) {
      setIsAuthenticated(true);
    } else {
      setIsAuthenticated(false);
    }
    setIsLoading(false);
  });
}, []);
Chat Page
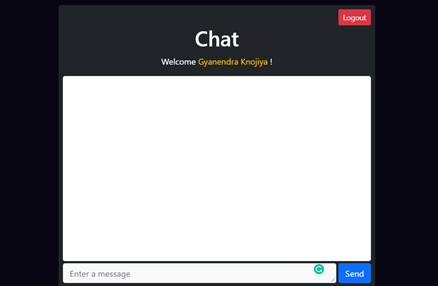
On a chat screen, we will have a logout button, welcome message, message box, send message text area.
<div className="d-flex vh-100 vw-100 justify-content-center align-items-center">
  <div style={{ maxWidth: 600, width: '90%' }} className="rounded shadow p-2 text-white bg-dark">
    <div className="d-flex">
      <span className="ms-auto btn btn-danger btn-sm">Logout</span>
    </div>
    <div className="text-center">
      <h1>Chat</h1>
      <p>
        Welcome
        <span className="text-warning">{user.displayName}</span> !
      </p>
    </div>
    <div className="bg-white rounded" style={{ height: 350 }}></div>
    <div>
      <form className="d-flex ">
        <textarea className="form-control mt-1 bg-light" placeholder="Enter a message" rows={1}></textarea>
        <div>
          <span className=" btn btn-primary mt-1 ms-1">Send</span>
        </div>
      </form>
    </div>
  </div>
</div>
Sending a message
First, we need to create a message collection to store all messages. Then schema for messages will we-
{
  "sender": user.uid,
  "senderName": user.displayName,
  "message": string,
  "createdAt": timestamp
}
const messageRef = firebase.firestore().collection('messages');

const handleMessageInput = (e) => {
  setUserMessage(e.target.value);
};

const handleSendMessage = (e) => {
  e.preventDefault();
  if (userMessage) {
    messageRef
      .set({
        sender: user.uid,
        senderName: user.displayName,
        message: userMessage,
        createAt: Date.now(),
      })
      .then(() => {
        setUserMessage('');
      })
      .catch((e) => {
        console.log(e);
        alert(e);
      });
  }
};
Showing message and get the message in realtime
Firebase provides a onSnapshot method. By using this method, we can get messages in real-time.
const [messages, setMessages] = useState([]);

useEffect(() => {
  const getAllMessages = messageRef.onSnapshot((doc) => {
    let tempMessages = [];
    doc.docChanges().forEach((change) => {
      if (change.type === 'added') {
        tempMessages.push(change.doc.data());
      }
    });
    setMessages((prevState) => [...prevState, ...tempMessages]);
  });

  return () => getAllMessages();
}, []);
Display messages
<div className="bg-white rounded " style={{ height: 350, overflowY: 'auto' }}>
  {messages.length ? (
    messages.map((message, i) => (
      <div className="d-flex" key={i}>
        <div
          className={`m-2 p-2 rounded w-75 ${message.sender === user.uid ? 'ms-auto text-dark' : 'bg-dark text-white'}`}
          style={{ background: '#E8F6EF' }}
        >
          <div style={{ fontSize: 11 }}>
            <span className="text-muted">{message.senderName}</span>
            <span className="float-end text-muted">{new Date(message.createdAt).toUTCString()}</span>
          </div>
          {message.message}
        </div>
      </div>
    ))
  ) : (
    <div className="text-center pt-5">No message found!</div>
  )}
</div>
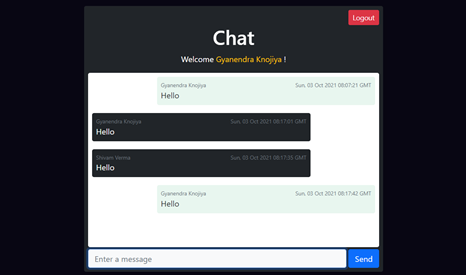
Output-
Logout
To logout the user, we can user firebase.auth().signOut(). After that, onAuthStateChanged function will be executed which is written in app.js and will set isAuthenticated to false.
const handleLogout = () => {
  firebase.auth().signOut();
};
Conclusion
Now our app is ready to deploy. In addition, you can add a loader where needed.
Source Code: https://github.com/gyanendraknojiya/firebase-chat-app
Demo: https://fir-chat-app-6f684.web.app
If have any queries, feel free to contact me https://gyanendra.tech/#contact Thanks